Thursday, March 1, 2012

I hate Winter!

Seriously, winter blows. It's too cold to do anything, and by anything I really mean working in the garage. I tried it once, when I had to sand down the wooden blocks for the photo gifts I was making for Christmas. My hands hurt so much from the cold and the vibration from the sander. Gloves would have been a smart idea, sure. But I had only planned to be out there for a minute or two and well, I was just too lazy to find them in the dim light coming from the small bulb in the corner of the garage. Ugh, I can't wait for summer!

Note to self: find better lighting for the garage.

Unfortunately, I haven’t been up to much since my last post. I’ve just been waiting for the temperature to warm up so I can finally get back to some projects. I did, however, manage to knock a couple off my list. I finally got around to framing my antique keys and the cute little antique door knob plates I bought at various antique and occasional shops.

Here’s an idea of what the Framed Door Knob Plates look like. I read this blog just about every day and I love her ideas! I’d show you what mine look like but the pictures aren’t nearly as cute as hers.

Other than that, I’ve just been on Pinterest ALL DAY LONG finding ideas for projects, decorating and pretty much anything that catches my attention.

Here are a few projects I’m thinking of doing:

I came across this when I was looking for ideas for what to do with all my old windows. I already have the bead board. The problem I’m facing is choosing pictures to frame.

for the window mirror

I saw this on etsy but I thought it would be neat to try and create something similar. Plus, it’s selling for $54, yikes! I think I might be able to make a cheaper version that's just as cute.
It probably wouldn't be too hard to make a version of this.


How adorable is this?!?! I have no idea how to find a piece of wood like this but I bet the chalk board paint part is super easy.

chalk board paint on wood. so cute- I would like to do this.

I have a ton more ideas for things to create; I’m just not sure if I’ll actually ever get around to making them. Cross your fingers for warm weather soon so I can get back to the windows and hopefully sell something.

Note to self: take cute pictures of the window mirrors already! And put them up on etsy!

That's all for now!


PS. I <3 Pinterest. If you haven't heard of it, check it out!! You'll be addicted for life!

***UPDATE***

This weekend my boyfriend and I had planned to go to Ikea to check out kitchen islands, or carts, whatever they're called. The purpose was to replace the ugly water cooler with the kitchen cart, place the 5-gallon water jug on top of it and use a water pump that fits neatly on top of the jug to dispense the water.  Bleh, good-bye nasty water cooler!

While at Ikea we discussed three options for kitchen carts.

The first option was white on the bottom, natural on top and short enough to fit in the space we planned to put it. The problem was that it was $199 and the shelves were metal instead of wood. We weren’t a fan of the metal.

The second option was its mini twin but with two wooden shelves and one metal shelf on the bottom. We considered this option for quite some time because it was $149. Less than the first option but we still weren’t sold.

The third option, and the one we ultimately went with, was solid wood and it was only $59.99. Score!

Here’s what it looks like.

BEKVÄM Kitchen cart IKEA Solid wood; can be sanded and the surface treated as required. Gives you extra storage, utility and work space.

Nothing fancy. But!  Yep, there's a but, because this is the whole point to the update. Here’s what I plan to do with it...


Ooooh, aaaaah! I know, cute huh?! I had come across this on Pinterest but hadn't pinned it. Probably because it didn't occur to me that I could actually buy that and make it over myself. I convinced Jody that if we bought it, I would make it pretty and because it was the cheapest option, of course he was sold on the idea. Sure enough, as soon as we got home, I found the pin and voilà, a plan was born.

I'm going to use a dark stain with a sealer on the top instead of distressing it and rubbing it with black paint. The bottom will still be white and I'll do some searching for fancy gadgets like the ones she used.

So there you go, my next project! I’m so excited! Just a couple more months and I’ll get to work on it outside. Hmmmph!

Tuesday, December 20, 2011

Busy, busy, busy!

Well, as you can see, it's been a long time since I've posted something. I was supposed to set up an Etsy account to sell the window mirrors but I needed cute photos to show them off. The plan was to paint our ugly sage green walls a more pleasing color and get some display shots but the walls are still a work in progress. There was also a Caribbean vacation, then a semi-lonely Thanksgiving and all of a sudden it's almost Christmas time and I needed to bust out the crafts to make all the cool presents I found on Pinterest.

Ha, you laugh because how cool can homemade gifts really be?

Freaking awesome!! Hello?! I was making them. How could they NOT be totally awesome?!

One idea I had was to make a candle out of a wine bottle. I saw a neat video on Pinterest that shows you how to cut a bottle with twine, nail polish remover, a flame and cold water.

The result you ask?

EPIC FAIL! Not only that but I almost lit Jody on fire. So it was back to the drawing board, aka the Internet, to research a better method.

Thanks to YouTube, I was able to find a safer way to cut a bottle from this video, here. This guy is super informative, the cutter was incredibly easy to make and the bottles turned out pretty good. It took quite a few to get a nice cut without the bottle cracking so patience was key. All in all it was a lot of fun and they look so cool!

Sorry in advance for the poor quality photos, these were all taken with the iPhone.

Filled with wax and cooling.

Next, I made my own stickers to adhere to the wine bottle candles just to fancy them up a bit. Yep, something else I found on Pinterest, but for some reason I forgot to pin it so you can find the tutorial, here. These took quite a bit of time during the paper removal part but they turned out really nice. Who would have thought you could make your own stickers?!

The picture below was found on the web. I can't remember where but hopefully I don't get in trouble for stealing it since this was only for a gift and not for sale.

This one is for my sister. Pretty huh?!

And lastly, I found a neat way to make a canvas portrait. The first one turned out so good that I bought three more stretched canvas but unlucky for me, they didn't turn out well. Meanwhile, I had this pinned for who knows how long so I decided to give it a shot. I got my butt to Home Depot, found the right size plank of wood for less than four dollars, had it cut to size for free, and BAM! I had ten cute little planks of wood to make portraits out of. These turned out the best but unfortunately I forgot to take photos of them. Thankfully my friend took a couple photos of hers when she received it.

First canvas portrait

What a cutie!! This is for my cousin since she was chosen as my Secret Santa family member. (This photo was taken before I sealed it with gel medium.)

Wood Portrait


My friend loved this! Who knew you could ship a regular mail package from Minnesota on Saturday and have it get to Washington by Monday.

So that's what I've been up to for the past month or so. I also bought a snowflake mold on Etsy to make peppermint bark. See cute photos and tutorial, here. Aren't they cute?! I have no idea when I'll have time to make these since I'll be in California next Wednesday visiting family and friends and making sangria, Christmas Peanut Butter Pretzel Bites and/or Rolo Turtles for our Christmas Eve Party. So much to do, so little time!

That's all for now. Hopefully my New Year's resolution will be painting the rest of the house and getting those window mirrors posted. I sure could use some cash for February. I'm going back home for my birthday the weekend my niece turns one year old.

By the way, I'm turning 30 soon. Ugh, I'm getting old.

Sunday, September 11, 2011

Alas, my first sale piece!

Well folks, it's finally finished! I have completed my first sale piece!

 
Voilà!

Click Here or on the For Sale tab located at the top of the page to view what's currently for sale and to learn more about each piece.

For now all pieces are available for local pick-up only but there's the possibility for shipment in the near future. I just need to chat with FedEx or UPS to figure out how my pieces can be packaged and shipped without damage.

I welcome any feedback you may have so please leave some love for me by adding a comment below. 

That's all for now but I'll hopefully have my next window mirror done by the end of the week so don't forget to check back later!

Monday, August 8, 2011

The Shelf Project


Okay, so maybe this doesn't fall into the "vintage" category but it's still neat. Plus, our walls are bare and I thought it would be fun to refinish.

Check it out, this shelf was not cute before I got my hands on it.


 Who ever put this thing together did not know what they were doing.
And they chipped the wood in the process.

As soon as I saw this shelf I just knew it needed a little TLC. So I brought it home, took it apart, and got started!

Oooh aaah! Stripped and sanded!

I'm so glad that Jody didn't mind me painting in the house. It was soooo flipping hot outside and I already spent enough time sweating my face off. Jody somehow found that cute. I did not. Sweat=gross!

Do you remember that odd backing to the shelf that was also painted black and had a little screw stuck through it? It didn't really match the rest of the wood and was pointless to strip or sand so I tossed it and replaced it with beadboard. 

Thanks to another fun blog I came across which gave me a cool idea for how to frame pictures to hang from my fancy new window mirror, I had some beadboard handy. I suppose you'll see a another post on picture frames in the near future.

Here's what it looked like after I painted and attached the beadboard.
Isn't it pretty?!?!

Look, no more chipping wood.

No more ugly screws that were improperly placed.
 Distressed just a tad to give it an old feel.

 These cute little birdies and keys are what I found at Atelier in Buffalo.

Now it's finished and ready to hang. I just need to figure out where.

And now back to vegging on the couch. I caught someone's nasty cold this weekend and have been at home all day trying not to sneeze and staying awake long enough to post this blog. I'm so bummed too because I really wanted to get started on my next window mirror. Time to rest so I can work on it when I'm all better.


Sunday, August 7, 2011

The Window Mirror Project


This is an awesome idea I came across when I was trying to figure out what to do with all the windows I’ve collected. It's an old basement window from a house in Hopkins that was built in 1922. Old things are so cool!

Here’s what it used to look like:


Since it was sitting outside for quite some time and had a bit of a funny smell to it, I decided it would be best to strip it and repaint it. (If I were to pinpoint the smell I'd say it was dog pee but I don't know for sure. For piece of mind, we'll say it just smelled old and maybe the owners were hippies.)

After removing the putty from around each pane I popped out the remaining pane of glass and pulled out all the little glazier points that held the original panes of glass in place. 


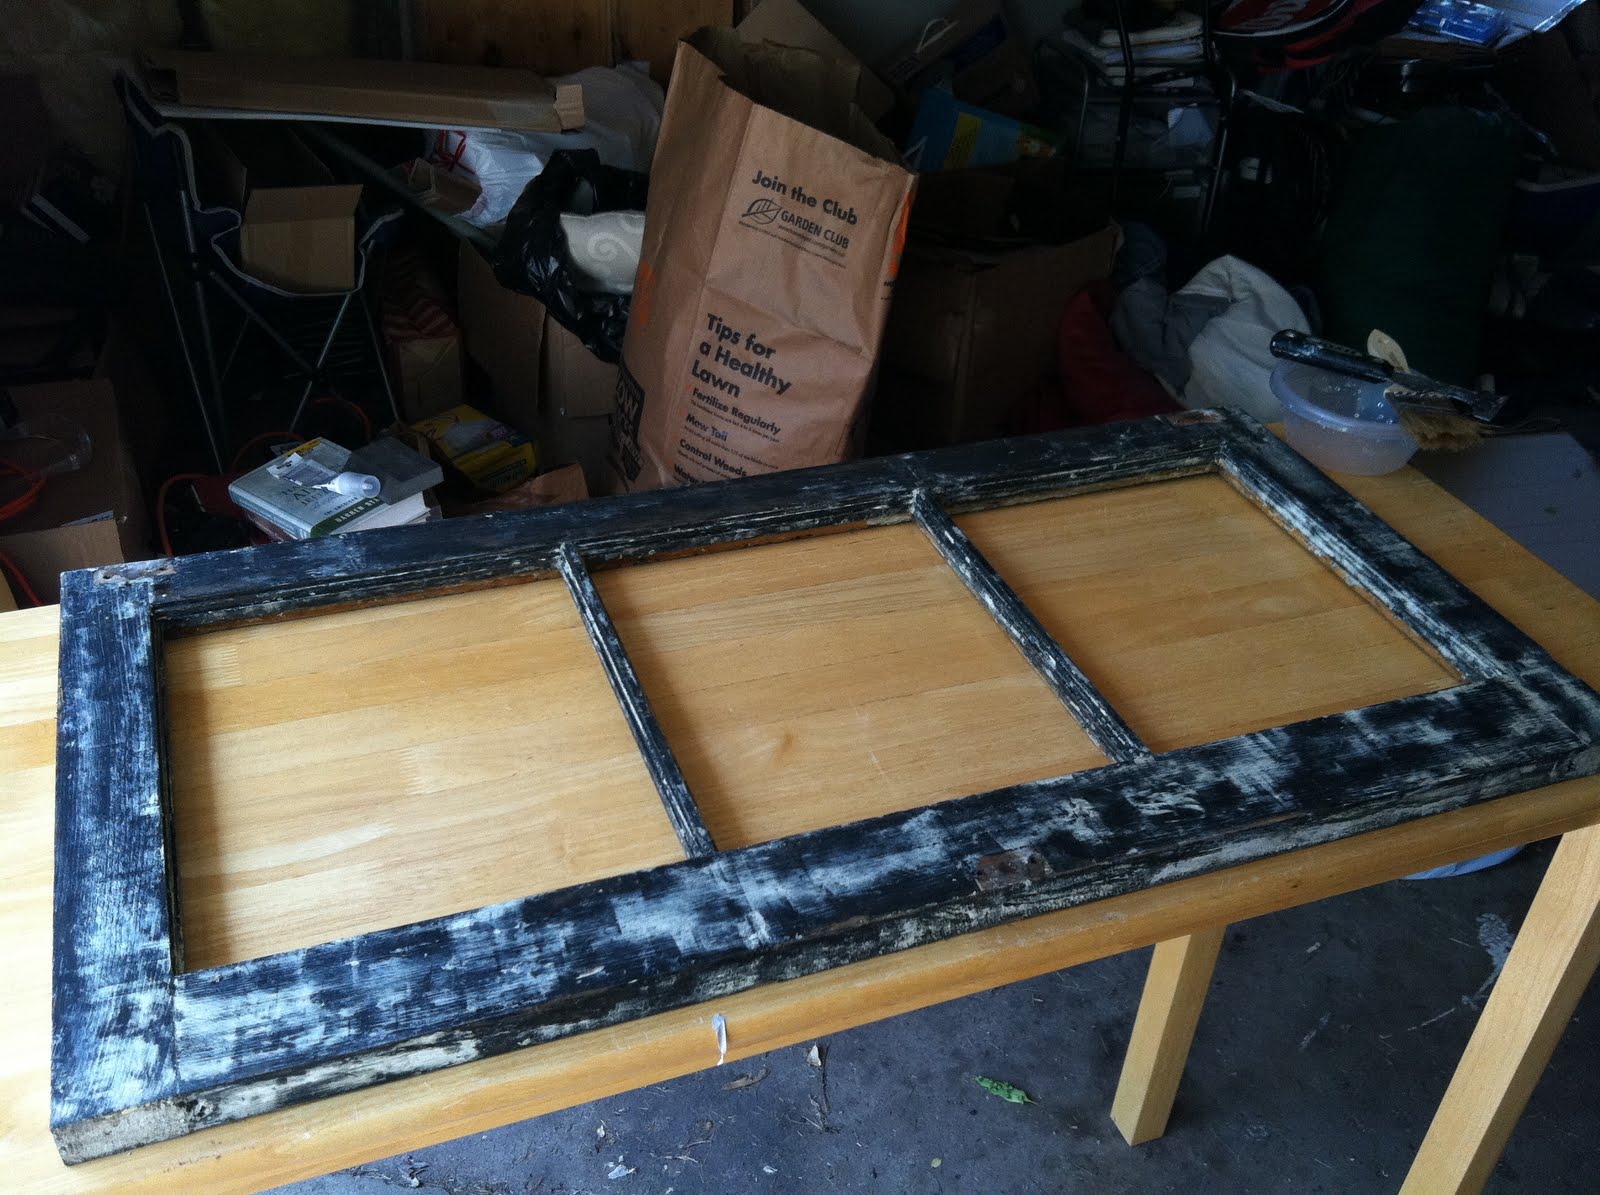
From there I stripped it the best I could only find that the wood was black. I'm not sure why that was. Maybe someone with a little more knowledge of old wood would be able to explain it for me. 


Eww!


I figured this was the best it was going to get so I crossed my fingers and hoped a nice sanding would do the trick.

 I said I hoped a nice sanding would do the trick. Eh, good enough.

At this point it was ready for paint and as you can see in the next picture I chose white.


This part was fun.

<Insert sarcasm here>

After beginning to distress the window by sanding it, the paint started to rub off like an eraser on paper. No bueno. I had used primer and paint in one and figured that was a bad idea and since it looked like crap I scrapped it and started over. 

I did not take another picture after stripping, sanding, priming and painting it again because that would have been pointless. The window was just white again. 

But here's what it looked like after another good sanding:

 Ooh pretty!

All it needed at this point were some mirrors and hooks. I'm so glad there's a locally owned hardware store near my house that custom cuts mirrors and glass. Three mirrors that were about 10 x 12 inches cost less than $20. Score!

And here's the final product again:

 Hi tiny girl! (My kitty)

Sorry the photos aren't spectacular. I had used my iPhone for most of them so that I could post them to Facebook for all my friends to see.

So what do you think? Would you want this in your entry way? Let's hope so because I'm making five more of them to sell. I have a few more paint colors that I found in the "Oops Paint" section at Home Depot that I plan to try out. I just know you're going to love hot pink, neon green and poop brown.

Just kidding!! 

I found a neat light green-ish color, an interesting purple-ish color that I'm not quite sure about and a pretty light blue. To be safe, I'll just start with white again. Everyone loves white, right?

Bye for now. 

Oh, and just for fun, I have another fun project that I just finished today. Let's just say it's not a window but I think you'll still like it. Especially since it looks WAY better than it first looked when I bought it from a chick through craigslist for $12.

Wednesday, August 3, 2011

Welcome!

I just wanted to take a moment to welcome you to my blog. I've never really blogged before so I'm not sure how this will turn out yet. The idea is that I'll post whatever I feel like posting but also post things I've made with the hopes to sell them.

Here's my sitch...

I moved from California to Minnesota a little over a year ago to live with my boyfriend. Because all I do is work and until now didn't have a hobby, I've become miserably bored and miss home but I can't afford to fly back as often as I would like. I recently stumbled upon the idea of making things with vintage windows and after showing them to my friends they said I should sell them. So here we go! I'll be posting pictures and listing prices as soon as I complete each window or other fun projects I come up with. I'm open to custom orders so let me know if there's something you like and I'll see if I can make it for you.

Just a side note: Please keep in mind, these may not all be my original ideas. Everyone draws inspiration from various places but I guarantee these are all stripped, sanded, painted and distressed by me and no one else. I really hope they do well and if you have any fun ideas to share, feedback, comments or whatever, feel free to send them along. Thanks!